When it comes to cooking, I am enormously interested, but easily intimidated. I want to be able to whip up a delicious home-cooked meal for my family and friends like so many of the great chefs in our city, but I need a little guidance on where to begin.
Originally designed by the makers of the Japanese Santoku knife (used mainly for cutting fish), the hollows on the blade of some chef’s knives keep food from sticking to them.
There are lots of ways to become a great chef: culinary school, mentorships, self-teaching, following a great cookbook or even learning from a celebrity chef on TV.
While I'll have to save full-blown culinary school for my next career, the Viking Cooking School invited me to experience one of the classes they offer in Ridgeland. I figured Basic Knife Skills was as good a place as any to get some fundamentals.
I walked into a kitchen full of gleaming stainless steel and blonde wood and every pot and pan you could possibly imagine. Our instructor, Kelli Stout, offered wine to start out with. (My kind of class!)
Eventually, all seven of the students arrived. With six women and one man, it was a small class—they can accommodate over double that number—which meant we got a lot of hands-on time.
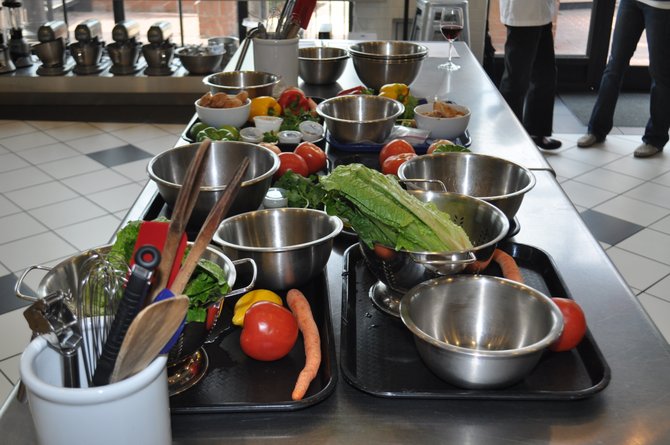
Trays of colorful vegetables were awaiting our blades, but before getting our hands dirty, we sat down to talk about knives. There are lots of different knives, the instructor told us. The most vital knife in a cook's arsenal is a chef's knife. (It's the one you see on all the cooking shows), and if you only own one good knife, make it a chef's knife.
Knife safety and quality tips:
Always keep your knives sharp. “A dull knife is a dangerous knife,” Stout informed us.
Never use your knives as tools. They are not screwdrivers, gardening shears or toothpicks to get bits out of the garbage disposal.
Never cut something in your hand, or on glass or stainless steel. Cutting in your hand is dangerous, and cutting on those surfaces could ruin your knives. Use a cutting board—Stout recommended wood for vegetables, plastic (so you can sanitize it in the dishwasher) for raw meat and seafood, or fiberglass.
Keep fingertips out of the way of the blade by adopting the “claw” hand. Curl your fingers under and keep the blade parallel to your row of knuckles.
The standard chef's knife is 8 inches long, Stout told us, but they also come in a 60-inch length for petite hands and "if you're a big ole' honkin' man, it comes in a Freddy Krueger size, the 10-inch," Stout said. "That's the Halloween knife. It's all the same knife, just different sizes. The best knife for you is the one that fits your hand—so don't let anybody tell you you've got to have one over the other, because it's the same knife." Chef's knives have long, straight spines and slightly curve up at the tip on the blade side, which aids in creating the proper rocking motion while cutting.
Knives come in many shapes, with many purposes: Santoku knives, cleavers, boning knives aka filets, bread knives, meat forks, cheese knives, slicing knives and even tomato knives (and more).
Easily the most useful thing we learned was also the first: how to hold a knife, and the motion to use while cutting. All seven of us students were doing both of these things wrong when we arrived for class.
To hold the knife, Stout instructed us to pinch the back of the blade just past the bolster (avoid the sharp part, obviously, but really hold the blade) with the thumb and forefinger and then wrap the rest of the hand around the handle. "Hold it by the blade, not way down by the handle. You have to work much more," she said. "If you hold it by the blade, you have lots more leverage. Now the knife is doing the work, and not your arm."
The next step is the motion. We learned that the tip of the knife should almost never leave the cutting board. You draw back, dragging the tip on the board, and then push down and through, which is the part of the motion that does that actual slicing and dicing. "Pick up and pull back, push down and through," Stout instructed. "Think of an old-fashioned locomotive."
Cutting with the back of the knife is all about using letting the knife do the work for you. "This is the powerhouse of the knife, not at the tip," Stout said.
Staying Sharp
Stout recommended getting a professional to sharpen nice knives. Usually the same place you purchase the knives will also sharpen them or can send them away to be sharpened.
You can use the sharpening steel (the long steel cylinder) that typically comes with your knife set, but if you don’t put the knife at the correct angle—around 20 degrees—you can easily ruin the knife. “So I say, if this came with your set, just leave it in the drawer,” Stout said.
“You could do a lot more damage than you can to help your knife.
As we all practiced slicing invisible tenderloins and carrots (and drank more wine—but don't worry, no one lost a finger), Stout gave us the basics of cutting terminology. There's julienne (which means cut into strips); dice; small dice and brunoise (cutting into small squares or cubes—regular, small and tiny); rondelle (into round slices, like carrots); batonnet (long strips with square sides); and mince (a very fine chop).
She helped us adjust our grip and our method, laughing that she wishes she could get her own mother to follow her advice.
Stout shared one type of student that tends to get off the hook when it comes to knife skills, though. "We had a guy one night, and he was doing this (mimes little tiny cuts), and I said, 'Sir can I show you an easier way?'" Stout recalled. "He said, 'Well I'm a surgeon.' Never mind! You can do it however you want to. He was doing it so meticulously, I was thinking he'd be doing it all night, but once I heard he was a surgeon, I was like, whatever you're doing with a scalpel is fine."
At last we got to put our new skills to good use. We chopped a variety of vegetables for salsa, learning tricks for cutting onion and bell pepper without pieces going all over the cutting board. We marinated and then cut chicken, sliced strips of mushrooms and more vegetables, and finally cranked up the fire to turn everything into fajitas.
As I bit into what we had made—maybe not quite gourmet, but certainly exciting—I was proud of my small moment in a chef's shoes. I've got a lot more to learn, but I can't wait for the next culinary adventure.
More stories by this author
Support our reporting -- Follow the MFP.